Welcome to the Craft Corner
Beginner: Bedroom Crafts
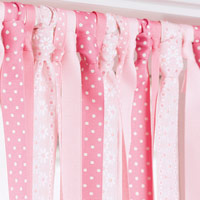
Ribbon Curtains
Tools
Curtain rod/bar
Strips of ribbon (sized longer than window)
2 Large hooks (to hold the curtain rod)
Strips of ribbon (sized longer than window)
2 Large hooks (to hold the curtain rod)
Instructions
1. Tie one end of the strips of ribbon to the curtain rod, one at a time (We used a necktie knot)
2. Alternate the colours or patterns if using multiple styles of ribbon
3. Seal the large hooks above the window where the curtain rod will sit. Put the rod into the hooks
4. Trim the ribbon so that it hits just below the window
2. Alternate the colours or patterns if using multiple styles of ribbon
3. Seal the large hooks above the window where the curtain rod will sit. Put the rod into the hooks
4. Trim the ribbon so that it hits just below the window
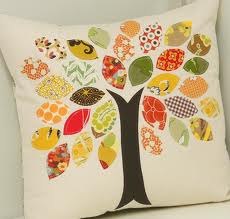
Funky Pillows
Tools
Solid colored pillow or throw pillows
Fabric scraps cut into shapes, felt shapes or fabric paint
Embellishments
Fabric glue
Masking tape
Fabric scraps cut into shapes, felt shapes or fabric paint
Embellishments
Fabric glue
Masking tape
Instructions
If using fabric paint:
1. Using masking tape, create a design on the pillow to create borders for the paint
2. Using fabric paint, paint within the borders
3. Allow 24 hours to dry
4. Use fabric glue to glue on any wanted embellishments and allow for an additional 24 hours to dry
If using fabric scraps or felt shapes:
1. Using fabric glue, secure scraps/shapes to desired position on the pillow
2. Allow for 24 hours to dry
3. Add wanted embellishments using fabric glue and allow for an additional 24 hours to dry
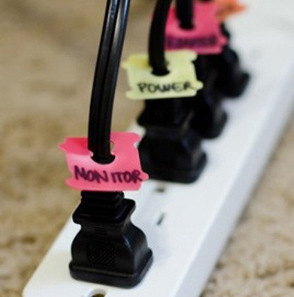
Bread Bag Tag Labels
Tools
Bread bag tags
A marker of any colour
A marker of any colour
Instructions
1. On each bread tag, with your marker, label different power cords that are used at your computer desk.
2. Enjoy a confusion-free time when unplugging power cords!
2. Enjoy a confusion-free time when unplugging power cords!
